
In response to player input, The Forge has expanded support for private servers. With private servers, you will no longer have to fight hackers and exploiters to mine and safeguard ores. Setting up a private server on Roblox is a simple process. Nevertheless, we’ve included a step-by-step guide below if you’re new and want to learn how to obtain a private server in The Forge.
How to Set up a Private Server in The Forge
To mine the best ores in The Forge in peace, make a private server using one of the two ways listed below.
You can either approach the setup from the ‘Servers’ tab on the game page on the Roblox website in a browser. Or you can open the game page in the Roblox app and scroll down to the ‘Servers’ option. The steps from there onwards remain the same and have been explained below.
- Under the Private Servers section, click the ‘Create Private Server’ button.
- Next, enter a ‘Server Name‘ in the pop-up window that opens.
- Click the ‘Subscribe‘ button at the bottom to make the server.

The required Robux, 100 Robux, will be deducted from your Roblox account on the creation of the server in The Forge.
Note that Roblox sets up a recurring monthly subscription for paid private servers. So, make sure you have enough Robux in your account if you want to use your private server regularly in the future.
The first thing you should do after setting up your server is redeem the latest The Forge codes to get free race rerolls in the game.
How to Invite Friends to Your The Forge Private Server
Once your server is set up, you can then choose who can and cannot join your private server in The Forge. To change that, follow the steps below.
- On the Servers page, click the three-dot icon next to your private server.
- Select the ‘Configure’ option from the three-dot menu.
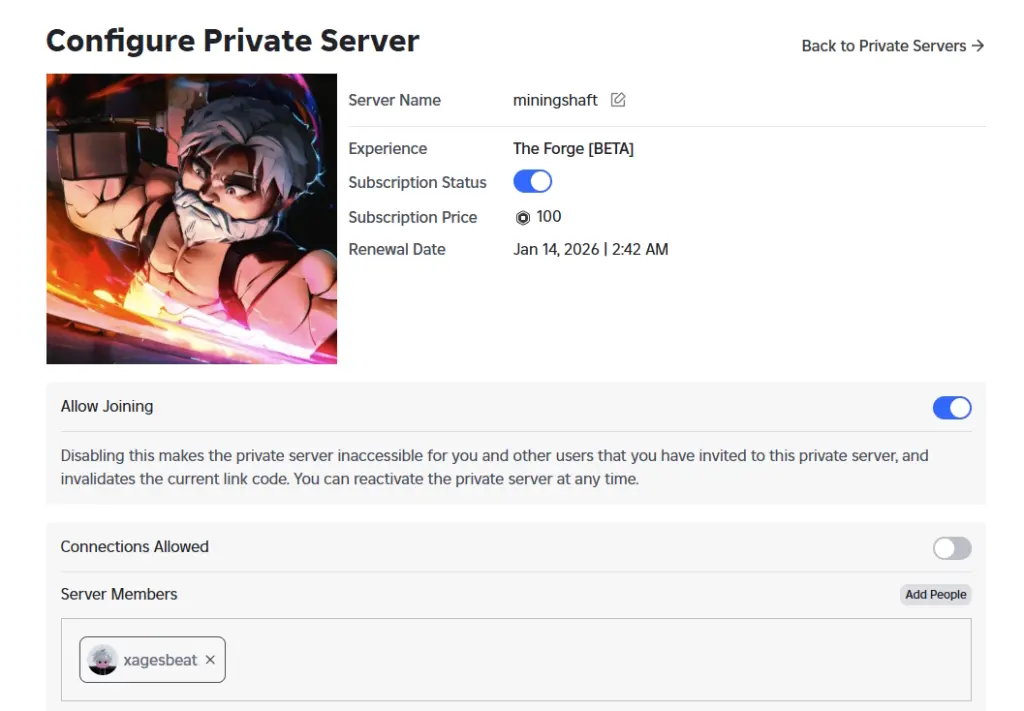
- Now, you need to make sure the ‘Allow Joining’ toggle is enabled so your friends can join the private server.
- Moreover, you can either allow all your collections to be allowed to join the server, or you can choose to allow select people on the server by adding their names to the list, as shown below.

If you don’t wish to continue using your private server, make sure to cancel the subscription. You’ll just need to the ‘Configure Private Server’ page and turn off the toggle next to the ‘Subscription Status’ option.